

An Inside Look at a Perma Jack of St. Louis Basement Drainage System Installation
When homeowners hear the term “basement waterproofing system,” they often picture a sump pump sitting in the corner of the basement. But the sump pump is only one piece of the system. The real work happens underneath the floor.
Recently, our team at Perma Jack of St. Louis completed a basement waterproofing project and documented the process from start to finish. We thought it would be helpful to show homeowners exactly what goes into a professional basement drainage system and how it protects a home from groundwater intrusion.
Why Basement Drainage Systems Are Needed
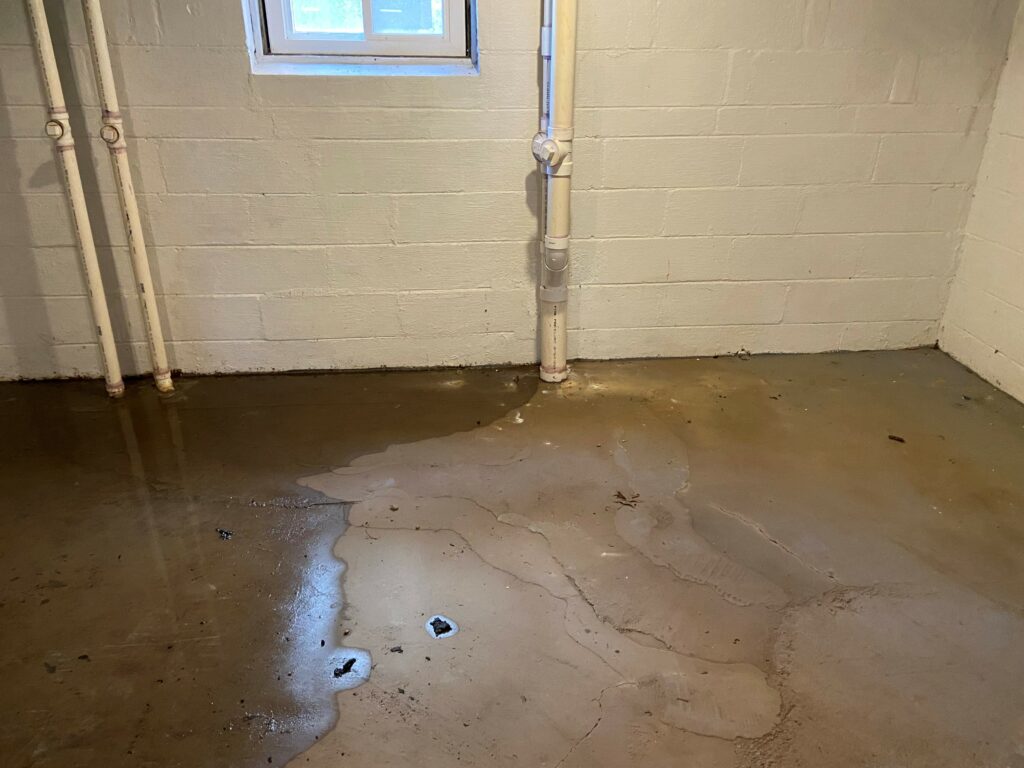
One of the biggest misconceptions we hear is that water is somehow “coming through the wall.” While that can happen, most basement water problems in the St. Louis area are actually caused by hydrostatic pressure. After heavy rain, water saturates the clay-heavy soil surrounding the foundation. As pressure builds, groundwater looks for a path of least resistance.
Often that path is:
- Foundation cracks
- The cove joint where the wall meets the floor
- Floor cracks
- Porous concrete
The goal of a basement drainage system is not to stop groundwater from existing. It’s to give that water a controlled path before it reaches your finished basement.
Step 1: Identifying Water Entry Points
Every project starts with an inspection. During many inspections, we find homeowners focusing on where they see water. But the water often entered somewhere else before traveling across the floor.
Our team evaluates:
- Water entry locations
- Existing cracks
- Drainage conditions
- Signs of hydrostatic pressure
- Previous waterproofing attempts
Step 2: Excavating the Drainage Trench
Once the layout is established, a trench is excavated around the perimeter of the basement floor. This trench creates space for the drainage system that will collect groundwater before it reaches the living space. Many homeowners are surprised by how much of the waterproofing system actually sits below the concrete floor.
Step 3: Installing the Soil Barrier Fabric
One thing we’ve learned over years of waterproofing basements is that groundwater isn’t the only thing moving beneath a floor. Fine soil particles move too. That’s why we install a soil barrier fabric within the trench before placing the drainage stone and pipe. The fabric helps:
- Prevent soil migration
- Reduce sediment buildup
- Protect the drainage system long term
This is an important step that many homeowners never see once the floor is restored.
Step 4: Installing the Perforated Drain Pipe
Next comes the heart of the drainage system. A perforated drain pipe is installed throughout the trench and pitched toward the sump basin. As groundwater rises beneath the slab, it enters the drainage stone and pipe system rather than pushing directly into the basement. This is what relieves the hydrostatic pressure causing many basement leaks.
Step 5: Connecting to the Sump Basin
The drainage pipe directs collected groundwater into a sump basin. This basin acts as a collection point where water can be safely discharged away from the home. Many homeowners think the sump pump is the waterproofing system. In reality, the sump pump only works because the drainage system continuously feeds water into it.
Step 6: Covering the System With Stone
Once the drainage components are installed, clean drainage rock is placed around the pipe. This creates an area where groundwater can move freely into the drainage system. The stone also helps protect the pipe while promoting efficient water collection.
Step 7: Restoring the Concrete Floor
After the drainage system is installed and tested, the trench is sealed with new concrete.
Once completed, most homeowners would never know a drainage system exists beneath the floor.
But underneath that concrete is a pathway designed to manage groundwater for years to come.
Step 8: Installing the Sump Pump and Freeze Guard
The final step is installing the sump pump system and discharge line. In the St. Louis area, winter conditions can create another challenge: frozen discharge lines. That’s why many systems include a freeze guard, which provides an alternative discharge point if the primary line becomes blocked by ice. This helps ensure the system can continue protecting the basement even during freezing temperatures.
What We See Most Often in the Field
One thing our team frequently encounters is homeowners waiting until the first major basement leak before considering waterproofing. Many of these homes have been dealing with groundwater pressure for years. The warning signs were often already there:
Musty odors
Efflorescence on walls
Hairline cracks
Damp carpet edges
Occasional moisture after heavy rain
The major leak simply became the first symptom they couldn’t ignore.
Why Basement Drainage Systems Work
A properly installed basement drainage system doesn’t try to fight water. It manages it. Instead of allowing groundwater pressure to build beneath the foundation, the system intercepts water, directs it to the sump basin, and safely removes it from the home. That’s why interior drainage systems remain one of the most effective solutions for basement waterproofing.
Final Thoughts
Most homeowners never get to see what a basement waterproofing system looks like beneath the floor. But understanding the process helps explain why these systems are so effective at controlling groundwater and protecting finished basements. As these project photos show, basement waterproofing is much more than installing a sump pump. It’s a complete drainage solution designed to relieve pressure and manage water before it becomes a problem.
Contact Us for Basement Waterproofing in St. Louis
If you’re noticing water in your basement, damp walls, musty odors, or signs of groundwater intrusion, Perma Jack of St. Louis can help. Our team designs and installs complete basement drainage systems built for the soil and weather conditions we see throughout the St. Louis area.
Contact us today to schedule an inspection and learn more about the solutions available for your home.